Controller Factory and Action Invoker Part 1 - By Narendra Shrestha
We used the term request pipeline
interchangeably with the term request in our previous threads. What is request
pipeline in MVC Framework? Roughly the request pipeline constitutes the various
components into which our requests are queued. These requests then pass through
various pipeline components to generate the desired response.

Fig
1: Various components of the Request Pipeline in the MVC Framework
Let us briefly discuss about these
components.
- Request – It is commonly the request that we send to the MVC Framework in order to process a request such as redirecting, posting and rendering a view. Request can be generated in the Client-side or in the server side. Client-Side request may be simple URL format request or can be AJAX/JSON request to access web server methods. Server side request can be synchronous or asynchronous request made by the worker in the worker pool or can simply be background worker oriented. These request are directed towards the MVC Route Engine
- Route – Route Engine consists of the route table and various URL patterns which we specify while registering the route. The requested URL is matched against every route in the route table. The first match returning non-null value is selected as the valid route for the current request. The matched route contains the route values for the controller, action and other optional parameters. It also contains the route URL pattern, route constraints, route handlers, namespace constraints and Route Base implementation to generate the inbound and outbound URLs and many more. Refer to previous threads about route customization to get insight of these topics. The valid request is used to create the route value dictionary which we use to reference the current request status.
- Controller Factory – The Controller Factory is responsible for creating the instances of the controller of type “IController”. The controller factory looks up the value of “controller” in the route dictionary and creates the instance of the controller. We can tweak this behavior by implementing our custom Controller Factory or deriving from the Default Controller Factory. We can impact the controller instantiation by returning instant of any controller. Controller factory takes care of session storage and retrieval during. The controller instance created this way can be fully functional native MVC controller or can be custom controller (Refer controllers and action thread).
- Controller – Controller handles the request from the user, process them, invokes the action invoker to select the suitable action and provides the response (View). It can also manage the domain model or UI model in between the request by smoothly managing models through model binders. As you all are aware about flexibility of controllers, we shall not mention anything about its customizability (Refer controllers and actions from previous thread for details).
- Action Invoker – Action Invoker is responsible for selecting the valid action for the controller to proceed further with request processing. Action invoker invokes the action whose value is stored in “action” in the route value dictionary. Like controller factory, action invoker is also customizable giving us unprecedented power to change the action request.
- Action – Action are the methods within the controller which provides suitable outcome in response to the request. Actions are of various types or more accurately they return the result of type “ActionResult” or returns any class type derived from “ActionResult”. Actions are responsible for producing views, causing redirection and many more. The result of the action method is the response to the user’s request.
Controller
Factory
Of all these
components, our main interest at this moment lies in the controller factory and
the action invoker. We already gave little introduction about controller
factory. We stated that the controller factory creates instances of controllers
of type “IController”. Let’s get into detail.
Controller factory not only creates controller instances but interferes with
routing engine as well. We may register diversified routes in the routing
engine. While doing so we may have defined numerous regular expressions for URL
pattern in the individual routes. These routes become ineffective if our
controller factory skips the route processing and handles everything by itself.
The Controller factory definitely possesses the power to deflect the default
nature of the request processing. Instances of the controller created can be
the custom controller (Refer controller and action thread) or the default
controller. We have authority over how and which controllers are instantiated when
we chose to customize the controller factory.
Customizing
your controller factory can cost you lot of time, hard work, unnecessary
debugging headaches and frenzy testing hours. Customizing anything from the
scratch is not always a good idea, unless you’re aware about the consequences.
Developers customize the default behavior when they run into the lack of good
alternatives which exactly fulfills the gap. Implementing customized version of
the controller factory is not a good option at all. However, to explore the
working mechanism of the controllers behind the scenes, I will demonstrate you
an example of custom controller factory.
To
customize the controller factory we need to implement the interface “IControllerFactory” in our custom controller factory class. The
following skeletal code represents the structure of this.
using System;
using
System.Web.Routing;
using
System.Web.SessionState;
namespace System.Web.Mvc
public interface IControllerFactory
{
IController
CreateController(RequestContext
requestContext, string controllerName);
SessionStateBehavior
GetControllerSessionBehavior(RequestContext
requestContext, string controllerName);
void
ReleaseController(IController controller);
}
}
Listing 1:-Skeletal Code For interface “IControllerFactory”
The interface “IControllerFactory” has three methods which are purely for customizing the controller factory
behavior.
“CreateController” accepts parameters of
type “RequestContext” for request
context and “string” for the
controller name. “RequestContext” gives us access over the route data and the HTPP request context base.
The second parameter is for the reference of the controller name in string
format. This controller name represents the name of the targeted controller.
The controller name is extracted from the route value dictionary for the value
of “controller”. The result returned by
this method is an instance of the “IController” type (a controller).
“GetControllerSessionBehavior” method also accepts the
same set of parameters as in previous method. We can also make important
changes in this method owing to those method parameters. However, main aim of
this method is to set the session behavior of our controller. All we need to do
is return session behavior by returning any of the enumeration value in enum “SessionStateBehavior”.
“ReleaseController” is for the release of
the resources and connections occupied by our controller. When writing your own
custom controller factory, there is no guarantee that native .net garbage
collector will run. The garbage collector is responsible for freeing the
resource occupied by your controller.
You can implement the garbage collector behavior inside this portion. We
cast our controller to type “IDisposable” in order to invoke “Dispose” method. Only after
invoking this method we can clear out the unnecessary acquisitions acquired by
our controller.
In this example
we are only going to explore the behavior of the custom controller factory. For
this purpose, first we will create normal MVC controllers “Home” and
“NewProduct”. The following coding depicts these controllers in respective
orders.
using System;
using
System.Collections.Generic;
using System.Linq;
using System.Web;
using
System.Web.Mvc;
namespace
ControllerExtensibility.Controllers
{
public class HomeController
: Controller
{
//
// GET:
/Home/
public string Index()
{
return
"this is the index action of the home
controller";
}
}
}
Listing 2:-“Home”
controller
using System;
using
System.Collections.Generic;
using System.Linq;
using System.Web;
using
System.Web.Mvc;
namespace
ControllerExtensibility.Controllers
{
public class NewProductController
: Controller
{
//
// GET:
/NewProduct/
public string Index()
{
return
"this is the index action of the NewProduct
controller";
}
}
}
Listing 3:- “NewProduct” controller
To create custom controller that implements “IController” interface, we cannot add our custom controller class like a normal controller.
Instead right click the “Controller” folder and select “Add a Class” option. While
naming your class you must append the word “Controller” to the name of your
class. This is the naming convention of controllers in MVC Framework. For
custom controllers, we created the class “OldProductController.cs”. Definitely this class implements the interface “IController”. Remember our controller name is “OldProduct”. To know more about the custom controllers,
please refer to the thread Controllers and Actions. Below code represents the “OldProduct” custom controller.
using System;
using
System.Collections.Generic;
using System.Linq;
using System.Web;
using
System.Web.Mvc;
using
System.Web.Routing;
namespace
ControllerExtensibility.Controllers
{
public class OldProductController:IController
{
#region IController Members
public void Execute(RequestContext
requestContext)
{
string
actionName = requestContext.RouteData.Values["action"].ToString().ToLower();
switch
(actionName)
{
case
"index":
requestContext.HttpContext.Response.Write("<p
style='font-size:35px;'>You requested for the action
<b>Index</b></p>");
break;
default:
requestContext.HttpContext.Response.Write("<p style='font-size:35px;'>Action<b>"+actionName+"</b> doesn't exists</p>");
break;
}
}
#endregion
}
}
Listing 4:-“OldProduct” controller
Inside the above custom controller, we extracted the name of the target
action. To carry out suitable action according to the extracted action name
from the route value dictionary, a switch case is applied. For “Index” case, we
output an HTML informing the user about his request. While, for default cases
we write an HTML informing user that the requested action doesn’t exists.
We created custom
controller factory “MyControllerFactory” inside the “infrastructure” folder which implements the interface “IControllerFactory”. The code for this
custom controller factory is as shown below:-
using System;
using
System.Collections.Generic;
using System.Linq;
using System.Web;
using
System.Web.Mvc;
using
System.Web.SessionState;
using System.Web.Routing;
using
ControllerExtensibility.Controllers;
namespace
ControllerExtensibility.Infrastructure
{
public class MyControllerFactory:IControllerFactory
{
#region IControllerFactory Members
{
Type
controllerType=null;
switch
(controllerName)
{
case
"new":
controllerType = typeof(NewProductController);
break;
case
"old":
controllerType = typeof(OldProductController);
break;
default:
controllerType = typeof(HomeController);
requestContext.RouteData.Values["controller"] = "Home";
requestContext.RouteData.Values["action"] = "index";
break;
}
return
controllerType == null ? null: (IController)DependencyResolver.Current.GetService(controllerType);
}
public SessionStateBehavior GetControllerSessionBehavior(RequestContext requestContext, string controllerName)
{
return
SessionStateBehavior.Default;
}
public void ReleaseController(IController
controller)
{
IDisposable
disposable = controller as IDisposable;
if
(disposable != null)
{
disposable.Dispose();
}
}
#endregion
}
}
Listing 5:- “MyControllerFactory.cs”
In method “CreateController”, we applied
switch case to the parameter “controllerName”. For the
controller name with value “new” and “old”, we referred to the controller type
of “NewProductController” and “OldProductController” respectively. For
default behavior we redirect to the “HomeController”. In the default switch case, we set the route value “controller” to
“Home” and action to “Index”. The output of these assignments reproduces the
effect of reconciling to the default controller when we refer to nonexistent controllers
and actions. The controller instance returned is generated by “DependencyResolver.Current.GetService” method. This
method of dependency resolver flawlessly blends in dependency injection tools
(ex. Ninject). In later part while dealing with dependency injection, we will
use another alternative instead of this. The result returned is of type “IController” which can be a custom controller or default
controller. The purpose of other method has already been discussed in the
interface skeletal portion. The change is not substantial.
Last step is to register your custom controller factory in
“Global.asax.cs”. The controller factory is registered in “Application_Start” as highlighted in the code below:-
protected void Application_Start()
{
AreaRegistration.RegisterAllAreas();
RegisterGlobalFilters(GlobalFilters.Filters);
RegisterRoutes(RouteTable.Routes);
ControllerBuilder.Current.SetControllerFactory(new
MyControllerFactory());
}
Listing 6:- custom controller factory “MyControllerFactory” registration
When we run the project and access
1)
URL “/Old/Index”, we get
following output

Figure 2:- Redirecting to
URL “/Old/Index”
2)
URL “/Old/Any”, we get
following output

Figure 3:- Redirecting to
URL “/Old/Any”
3)
URL “/New/Index”, we get
following output

Figure 4:- Redirecting to
URL “/New/Index”
4)
URL “/Home/Index”, we get
following output
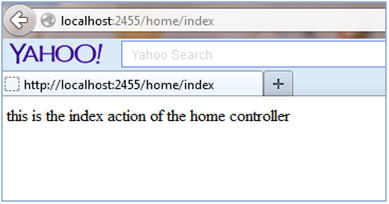
Figure 5:- Redirecting to
URL “/Home/Index”
5)
URL “/Any/Any”, we get
following output

Figure 6:- Redirecting to URL
“/Any/Any”
We ran all the possible cases and saw their output. The most interesting is
the last output in which we requested the controller “any” and the action “any”
which doesn’t exist at all. For this combination, the default case in the
switch statement in the custom controller factory was triggered. The value we
set to the route value dictionary for controller and index has taken its effect.
To inspect the behavior of the custom controller factory you can place the
break point within this switch statement and justify your query.
Default Controller
Factory
The custom controller factory didn’t prove so much useful in our last
example rather than tweaking the default route engine behavior. Merely no
developer wants to mess with this functionality as it invites intolerable
hardship and demands more rigid testing environment. Let alone the question for
its full implementation. The above topic was included for the fair introduction
to the custom controller factory. The condition is opposite in the case of the
default controller factory. You should know the rules and art to use the
default controller factory of MVC framework to take advantage that comes along
with it. One undeniable award we can reap from the default controller factory
is while dealing with dependency injection problem.
Dependency injection is one of the must see feature of the MVC Frameworks
which adds more meaning to the design of the MVC Framework. We want our MVC
Framework components to be independent for the design extension and to be
extremely upgradable in the near future. This is the main scoring edge of the
MVC Framework. The component can be any component such as classes, interfaces,
controllers, actions, routes etc. The real art of the MVC Framework is to make
update to the application by making changes in less areas as far as possible.
This practice maintains:-
- the integrity of the application
- introduces fewer bugs owing to less coupling among the components
- Saves from the overhead of updating and revisiting the test cases time after time with introduction of new components.
Overall, this practice increases the reliability and quality of our product. You may still have a confusion regarding dependency injection. Let me address this confusion.
I will introduce one typical dependency injection situation and later
proceed to solve it.
Let us say that we are creating an e-commerce web site in which users from
all around the world can perform online shopping.
Conditions
- For the American and the international citizens, we follow 10% discount scheme
- For the British citizens only, we follow 5% discount scheme
The cart for the user is maintained through session and contains the list
of items. The “item” is the class that represents the real world items. The
functionality of shopping is handled from the “Shop” controller alone.
The same code runs for both conditions to compute the total value for the
list of items in the cart.
One more thing to consider is the culture i.e. currency. For the dollar
conversion, we may straightly store and retrieve the item cost as dollar value
price to and from the database (if any). However, for the pound sterling, we
have to do extra work when conveying output. Let’s say that these are things
are crippled and shoved inside the “Shop” controller.

Figure 7: “Shop” controller and item class
with no separation of concern
Without the
separation of the concern, this is how a typical controller looks like. The
congested diagram notifies the ugly coding in the “Shop” controller. With so
many dependency coupled, we will certainly put our self through lot of hardship
when making changes to the shop controller. Due the tight coupling, when making
changes to logic for any country, we must make sure that we do not interfere
with the logics of other countries. Overall, our design pattern is insufficient
for maintainability.
Making the
separate classes for U.S. and international users i.e. “NewYorkBranch.cs” and for
British users i.e. “LondonBranch.cs”, we can reduce lots of dependency. Migrating separate logics to separate classes
eliminates two way dependencies between these logics. While changing logic for
the British citizens, we won’t be interfering with the current working logics
for other users around the world. We also eliminated dependency of “Shop”
controller from “Item” class as well.

Figure 8:-Logics
migrated to devoted classes making “Shop” Controller
This design in the above figure has lots of hidden drawbacks. Notice that
“Shop” controller is dependent upon both “NewYorkBranch.cs” and
“LodonBranch.cs”. This pictures a situation in which we have to create the
instance of the all the classes in the “Shop” controller. This is something
like writing “new LondonBranch()” and “new NewYorkBranch()” in the “Shop”
controller. The problem with this design is when introducing a new logic (for
ex. French Users specific logic) we have to make changes in the “Shop”
controller as well. This adds overhead to the testing criteria i.e. we need to
test for intactness of other branches as well as ensure integrity of the “Shop”
controller.
Using .net
interface can show us the light for above problem. To be eligible as a branch,
our branch classes must implement interface “IBranch.cs”. It is this interface
which is going to be used by “Shop” controller. This reshapes our system design
as show in the diagram below.

Figure 9:- With the introduction of the
“IBranch” interface
Still there is one anomaly left in the above figure that needs to be
sorted. That anomaly is non-other than the prevailing dependency between the
logistics class and our “Shop” controller. Why this dependency is still there when
we have already introduced “IBranch” interface? The answer is that even though our “Shop” controller uses “IBranch” version, but during instantiation of the
interface, it relies on these logistic class to create new instance. This means
there is still code like “IBranch ukBranch=new
LondonBranch()” in our
controller. To eliminate this dependency, the dependency injection (DI) tool is
our next stop. We always must keep wide arsenal of dependency tools. MVC
Framework has its own dependency injection tool called “Unity”. However, we use
“Ninject” as a dependency tool for our purpose because it is free source and
easily available from Nuget package. If possible I will cover “Unity” in the near
future. You must know that purpose of using any dependency injection tool is
same.

Figure 10:- With the introduction of the dependency injection
The benefit that comes with the introduction of the dependency injection
tool is the elimination of the unnecessary dependency from figure 8. We arrived
at a state in which we can introduce any new logic relating to any newly added
country. We only need to handle this in dependency injection container. Our new
logic for newly added country works fine without any change in “Shop”
controller. This reduces lengthy testing hours since we no longer need to test
“Shop” controller every time when we make change to other units. We can say
that our system is extensible because we can add any country that implements “IBranch” interface without bothering about “Shop”
controller.
In next section
we’re implementing this example for real.
“item.cs” class is listed as below:-
“item.cs” class is listed as below:-
using System;
using
System.Collections.Generic;
using System.Linq;
using System.Web;
namespace
ControllerExtensibility.Models
{
public class Item
{
public string Name { get; set; }
public int ItemNumber { get;
set; }
public decimal Cost { get; set; }
public int Quantity { get; set; }
}
}
Listing
7:-“item.cs” class
The item class
represents a unit of any item in the cart. We keep track of item name, cost, id
and quantity in cart through this class. This class is defined inside the
“Models” folder of the MVC application.
“IBranch” interface is used by
concrete classes like “NewYorkBranch.cs” and “LondonBranch.cs”. This interface
defines a method that every deriving concrete class should have. Each concrete
class can have their own version of this method. Following code shows the
interface “IBranch”.
using System;
using
System.Collections.Generic;
using System.Linq;
using System.Web;
using
ControllerExtensibility.Models;
namespace
ControllerExtensibility.Infrastructure
{
public interface IBranch
{
decimal
ComputeTotalCost(List<Item> items);
}
}
Listing 8:-“IBranch” interfac
Concrete class implementing this interface should have method “ComputeTotalCost”, which accepts list of items as parameter, and it computes the total cost
of the items in the cart. This method is a suitable candidate where we can
calculate the discounted value for total cost (as per condition defined
earlier).
The concrete classes are created within “Concrete” folder. This folder is situated/created
right inside the root folder of the MVC application. The below code shows the
“NewYork.cs” class which implements the logic to calculate total for the
American citizens and other international Users.
using System;
using
System.Collections.Generic;
using System.Linq;
using System.Web;
using
ControllerExtensibility.Infrastructure;
using
ControllerExtensibility.Models;
using
System.Threading;
using
System.Globalization;
namespace
ControllerExtensibility.Concrete
{
public class NewYorkBranch:IBranch
{
#region IBranch Members
public decimal ComputeTotalCost(List<Models.Item> items)
{
decimal
TotalCost=0.0M;
foreach
(Item item in
items)
TotalCost +=
item.Cost*item.Quantity;
TotalCost -= TotalCost * (10M /
100M);
Thread.CurrentThread.CurrentCulture
= new CultureInfo("en-US");
return
TotalCost;
}
#endregion
}
}
Listing 9:- “NewYorkBranch.cs”
The 10% discount logic is carried out within the only
method of this class. Next concrete class “LondonBranch.cs” class is listed as
below.
using System;
using
System.Collections.Generic;
using System.Linq;
using System.Web;
using
ControllerExtensibility.Infrastructure;
using
ControllerExtensibility.Models;
using
System.Threading;
using
System.Globalization;
namespace
ControllerExtensibility.Concrete
{
public class LondonBranch:IBranch
{
#region IBranch Members
public decimal ComputeTotalCost(List<Models.Item> items)
{
decimal
TotalCost = 0.0M;
foreach
(Item item in
items)
TotalCost +=
item.Cost*item.Quantity;
TotalCost -= TotalCost * (5M /
100M);
Thread.CurrentThread.CurrentCulture
= new CultureInfo("en-GB");
return
ConvertToPound(TotalCost);
}
public decimal ConvertToPound(decimal
dollarValue)
{
return
dollarValue * 0.595557144M;
}
#endregion
}
}
Listing 10:- “LondonBranch.cs”
This concrete class is little
variant than the preceding class. The reason is the method “ConvertToPound”. This method is used for
converting the dollar value to pound. In actual case this method can refer to
the web method that gives the correct conversion factor based on the daily
currency affairs. The 5% discounted total is converted to the pound and is returned
as the total cost. In both classes the culture has been changed so that we can display
correct currency symbols region-wise ($ for USA and international market, £ for British market). Maintaining separate logic classes gives us
enormous capability to individualize and customize every single concrete class
as per our need.
We have talked a great deal about dependency injection. This is the
time we dig right into the “Ninject” for this purpose. First make sure that you
do have an internet connecton. To download and install “Ninject” in your MVC
application, right click the MVC application in the solution explorer, and
select “Add Library Package Reference”.
You should see the following dialog

Figure 11: Add
Library Package Reference Dialog
Enter the key word
“Ninject” in the search box. You should see result dialog as shown below.

Fig 12: Add Library
Package Reference Search result dialog.
Obviously
pick up the first choice to install. After installation, all the necessary DLLs
of the “Ninject” will be automatically referenced in your solution. You can
reference these DLLs for another application as an offline alternative.
However, doing so will deprive you from update functionality which comes along
installing the “Ninject” directly.
With
everything in place now we need to implement our default controller factory
incorporating “Ninject” which we’ve just installed. We create class “NinjectControllerFactory” within “infrastructure” folder and derive
it from class “DefaultControllerFactory”. “DefaultControllerFactory” is the default implementation of the
controller factory. Only thing that we are going to tweak is the way in which
controllers are instantiated. We need exactly targeted concrete implementation
of “IBranch” interface based on the value of “branch” in route value
dictionary. The code for “NinjectControllerFactory” is as
shown below:-
using System;
using
System.Collections.Generic;
using System.Linq;
using System.Web;
using
System.Web.Mvc;
using Ninject;
using
System.Web.Routing;
using
ControllerExtensibility.Concrete;
using
ControllerExtensibility.Controllers;
namespace
ControllerExtensibility.Infrastructure
{
public class NinjectControllerFactory
: DefaultControllerFactory
{
IKernel
ninjectKernel;
string
branch;
public
NinjectControllerFactory()
{
ninjectKernel = new StandardKernel();
}
protected
override IController
GetControllerInstance(RequestContext
requestContext, Type controllerType)
{
if
(requestContext.RouteData.Values["branch"]
!= null)
branch =
requestContext.RouteData.Values["branch"].ToString();
AddBindings();
return
controllerType == null ? null : (IController)ninjectKernel.Get(controllerType);
}
private
void AddBindings()
{
switch
(branch)
{
case "New York":
ninjectKernel.Rebind<IBranch>().To<NewYorkBranch>();
break;
case
"London":
ninjectKernel.Rebind<IBranch>().To<LondonBranch>();;
break;
default:
ninjectKernel.Rebind<IBranch>().To<NewYorkBranch>();
break;
}
}
}
}
Listing 11:-“ NinjectControllerFactory” class
“IKernel” is for the reference of “Ninject” which can create objects
of all kind. The object creation is assisted by bindings and re-bindings of our
interface to our concrete class. “IKernel” object is
instantiated through “new StandardKernel()”
in the constructor of “NinjectControllerFactory”. The “GetControllerInstance”
method of the base class “DefaultControllerFactory” is
overridden so that the controller returned will bind our interface with
concrete class. The route date value of “branch” is obtained in through “RequestContext”. The controller instance is retrieved through “ninjectKernel.Get(controllerType)”.
The “controllerType”
refers to the controller type being requested which is already available as a
parameter. The controller instance must be casted to “IController”
before returning.
“AddBindings”
is the heart method for binding the dependency between the interface and
concrete class. “IBranch” can take any value in switch case
according to the value of “branch”. We use “ninjectKernel.Rebind<IBranch>().To<NewYorkBranch>()”
to bind concrete class “NewYorkBranch” to “IBranch” implementation in “Shop” controller. This makes “NewYorkBranch” instance available as “IBranch” type
in the shop controller. This concrete class instance is received in the
constructor of the “Shop” controller. We used method “Rebind” because
“Ninject” bindings are stored in the binding table. If we had used “Bind”
method we will get error for duplicating the same binding in multiple
occasions. “Bind” is suitable when we know beforehand which concrete class is to
be bind with which interface. Buy In our scenario, we completely rely on route
value data. That’s why we have called “AddBindings” while retrieving the
instance of the controller. More appropriately, we are continuously updating
the binding table based on the user request. If things were like one to one
mapping, then calling “AddBindings” only once from the constructor will
make sense. We use “Bind” instead of “Rebind” in our context (you
can be relaxed about the duplication unless you do it on purpose).
The
following code lists the “Home” controller. Remember, we haven’t performed any
dependency injection for the “Home” controller.
using System;
using
System.Collections.Generic;
using System.Linq;
using System.Web;
using
System.Web.Mvc;
using
ControllerExtensibility.Models;
namespace
ControllerExtensibility.Controllers
{
public class HomeController
: Controller
{
//
// GET:
/Home/
public ViewResult Index()
{
List<Item> items = new
List<Item>{new Item{Name="Watch",ItemNumber=1,Cost=200M,Quantity=1},
new Item{Name="Shoes",ItemNumber=2,Cost=250M,Quantity=2},
new Item{Name="Tie",ItemNumber=34,Cost=23M,Quantity=3},
new
Item{Name="Belt",
ItemNumber=25, Cost=69M,Quantity=2}};
Session["cart"]
= items;
return
View(items);
}
}
}
Listing
12:- “Shop” controller
In the “Index” action of
“Home” controller, the list of items in cart are hard coded and added to
session “cart”. This action method return strongly typed view “Index” of model
type “List<Item>”.
@model List<ControllerExtensibility.Models.Item>
@{
ViewBag.Title = "Index";
}
<h2>
Your cart</h2>
<table>
<tr style="background-color:
Gray">
<td>
Item Name
</td>
<td>
Price
</td>
<td>
Quantity
</td>
</tr>
@foreach
(ControllerExtensibility.Models.Item item in Model)
{
<tr>
<td>@item.Name
</td>
<td align="right">@string.Format("{0:C}", item.Cost)
</td>
<td align="right">@item.Quantity
</td>
</tr>
}
</table>
<p>
For international Users and American
Cititzens, buy from @Html.ActionLink(" New York Branch", "Index", "Shop",
new { branch = "New
York" }, new { })</p>
<p>
For British Cititzens, buy from @Html.ActionLink(" London Branch", "Index", "Shop",
new { branch = "London"
}, new { })</p>
Listing
13:-“Index.cshtml” view of “index” action of “home” controller
The interesting section
of this view is the action link /URL for international/American citizens and
British citizens. We specified the route data value of “branch” for these two
URLs. These URLs will be generated according to the default routes in the route
engine as shown below:-
routes.MapRoute(
"Default",
// Route name
"{controller}/{action}/{branch}",
// URL with parameters
new
{ controller = "Home", action = "Index", branch = UrlParameter.Optional } //
Parameter defaults
);
Listing 14:-Default
route registered in the route engine
When we click upon this
URL, we will run the bindings based on the branch route value and return
appropriate controller instance based on binding.
We’ve already mentioned that the concrete
class instance is available in “Shop” controller constructor. These concrete
classes are decided by “Rebind” method in “AddBindings”. The following
code lists the “Shop” controller.
using System;
using
System.Collections.Generic;
using System.Linq;
using System.Web;
using
System.Web.Mvc;
using
ControllerExtensibility.Models;
using
ControllerExtensibility.Infrastructure;
namespace ControllerExtensibility.Controllers
{
public class ShopController
: Controller
{
//
// GET:
/Shop/
public IBranch currentBranch;
public
ShopController(IBranch branch)
{
currentBranch = branch;
}
public ActionResult Index(string
branch)
{
List<Item> items = new
List<Item>();
if
(Session["cart"] != null)
{
items = (List<Item>)Session["cart"];
}
ViewBag.total=String.Format("{0:c}",currentBranch.ComputeTotalCost(items));
return
View();
}
}
}
Listing 15:-“Shop”
Controller
The
instance of created concrete class is assigned to “branch” of “IBranch” type (refer boxing and un-boxing in .net c# to get clear
concept about casting effect). Whenever we call “ComputeTotalCost”, we are
actually calling the real method of the bounded concrete class. The list items
are retrieved through session “cart”. Last but not least the formatted string
is stored in viewbag dynamic object “total”. This viewbag is used in
“index.cshtml” view of “Shop” controller as listed below
@{
ViewBag.Title = "Index";
}
<h2>Thanks for shopping!!!</h2>
<h2>Your total is :@ViewBag.total</h2>
Listing
16:-“Index.cshtml” view of “Index” action of “Shop” controller
In
the end, before running the project we must register our “NinjectControllerFactory” class like we registered our custom
controller factory class in the “Global.asax.cs”. We register our class in “Application_Start”
of this class as listed below
ControllerBuilder.Current.SetControllerFactory(new NinjectControllerFactory());
Listing 17:- “NinjectControllerFactory” registration
When we run the
project, we can see the following output

Figure 13:-“Index.cshtml” of “Index”
action of “Home” controller
1)
When clicking on URL “New
York Branch”

Figure 14:-
“Index.cshtml” of “index” action of “Shop” controller for route value “New
York”
2)
When clicking on URL
“London” Branch

Figure 15:-
“Index.cshtml” of “index” action of “Shop” controller for route value “London”
This is it, in brief
about using the dependency injection tool along with default controller factory.
Suppose that we add branch called “ParisBranch” for French user. We only need
to implement “IBranch” interface for this branch and place our discount logic as it was done for
other branch. Euro to dollar conversion scenario is same as it was for pound.
You will note that you don’t need to touch the “Shop” controllers at all. For
unit testing purpose, you can only test “ParishBranch” without worrying about
others. The beauty of dependency controller is finally being explored.
This is great revealing content. Thank you I really appreciate the unique articles you write. controllermodz provide this
ReplyDeletexbox one modded controllers
ASP.NET MVC Training | MVC Online Training | MVC Training | ASP.NET MVC Training in Chennai | ASP.NET MVC 6 Training | Dot Net Training in Chennai
ReplyDelete.Net MVC Training | ASP.NET MVC Online Training | C# MVC Training | ASP.NET MVC Training in Chennai | Online ASP.NET MVC 6 Training | Dot Net Training in Chennai